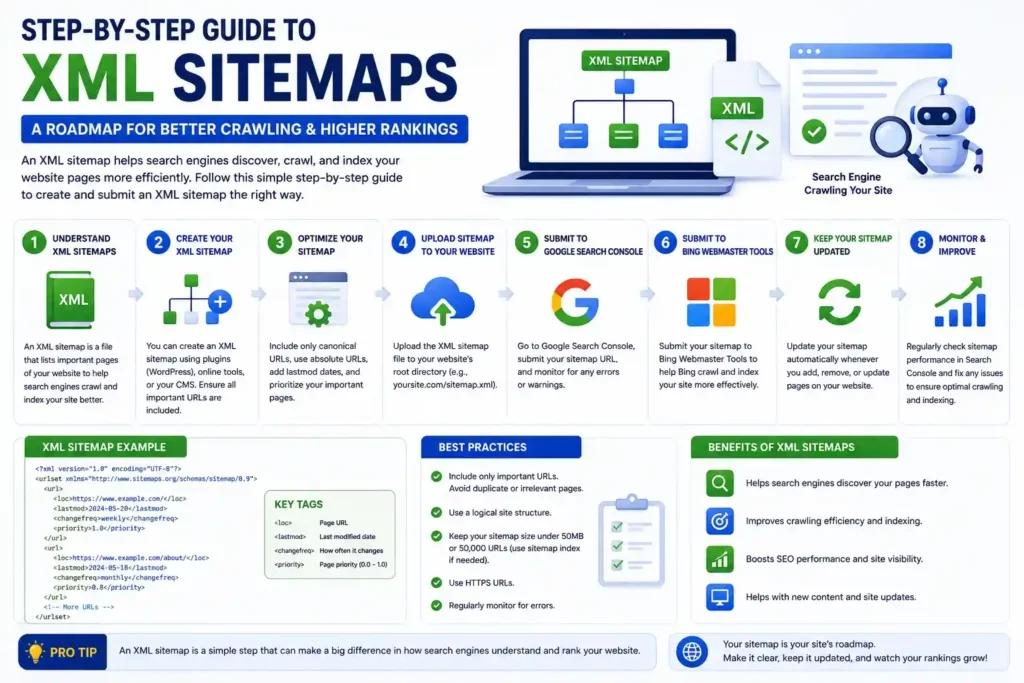
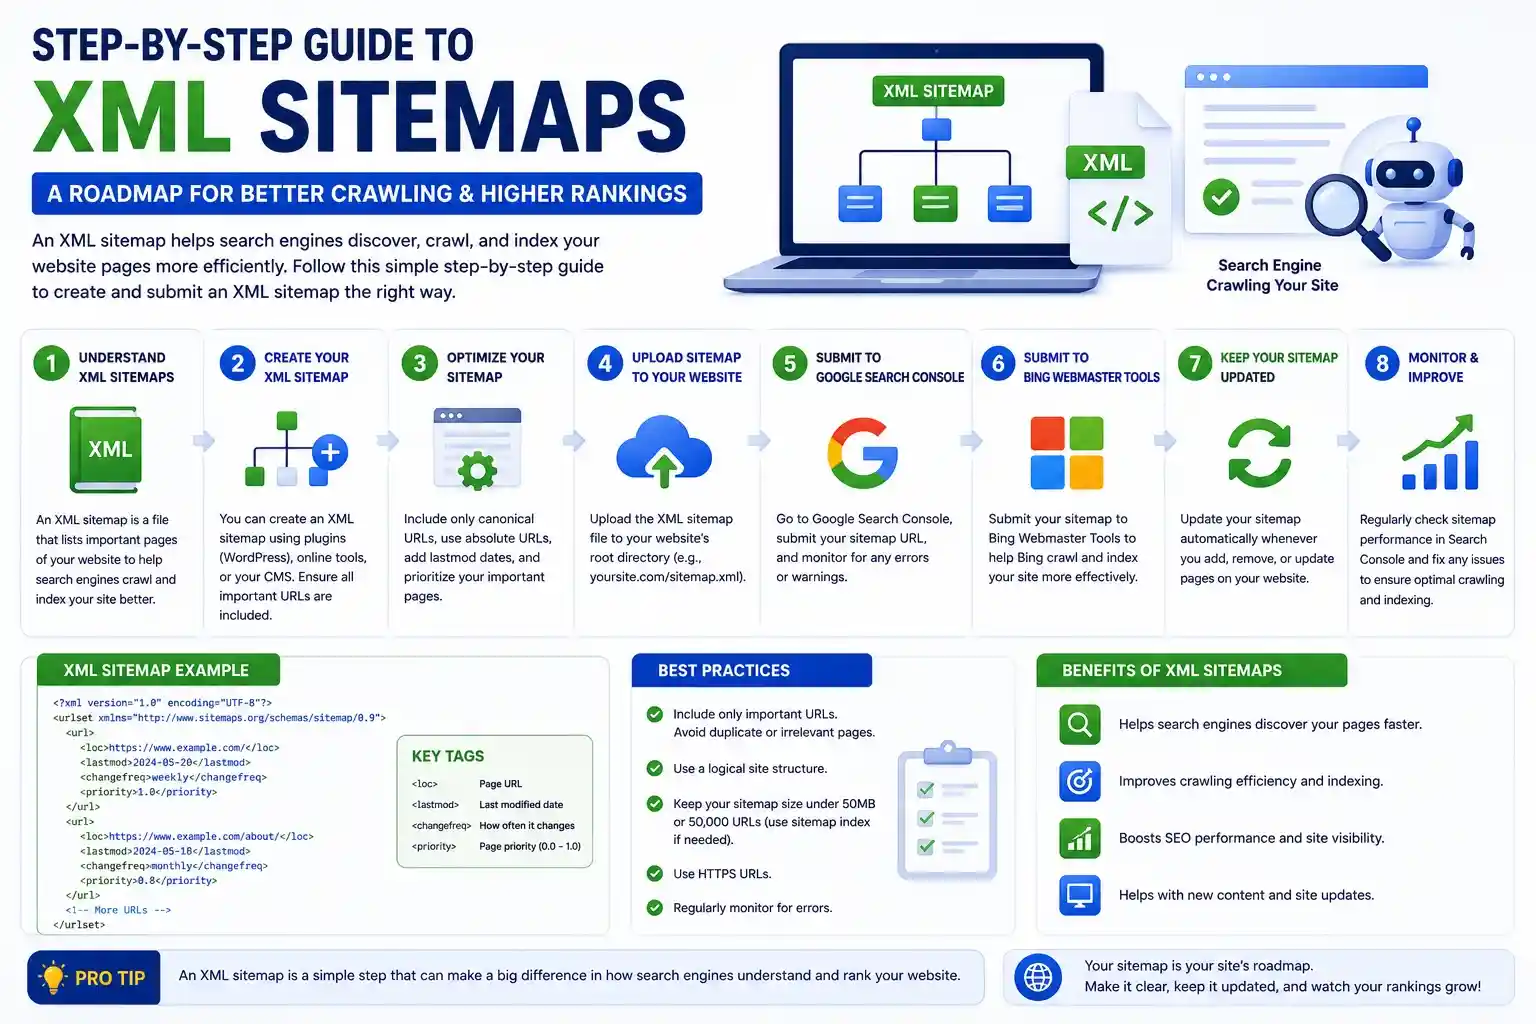

Imagine inviting guests to a massive, multi-level mansion without giving them a map or a directory. Some guests might eventually find the main dining hall, but they will likely miss the beautiful rooftop garden or the hidden basement theater.
Search engines experience the exact same problem when they visit a website without a roadmap. If you want Google to discover, crawl, and index your content efficiently, you need to provide clear directions. This is where an XML sitemap comes in.
Table of Contents
Whether you are launching a brand-new blog or managing an enterprise-level e-commerce store, learning how to create an XML sitemap is a foundational step in technical SEO. In this comprehensive guide, we will walk you through exactly how to build one, best practices to follow, and how to submit it to search engines for maximum visibility.
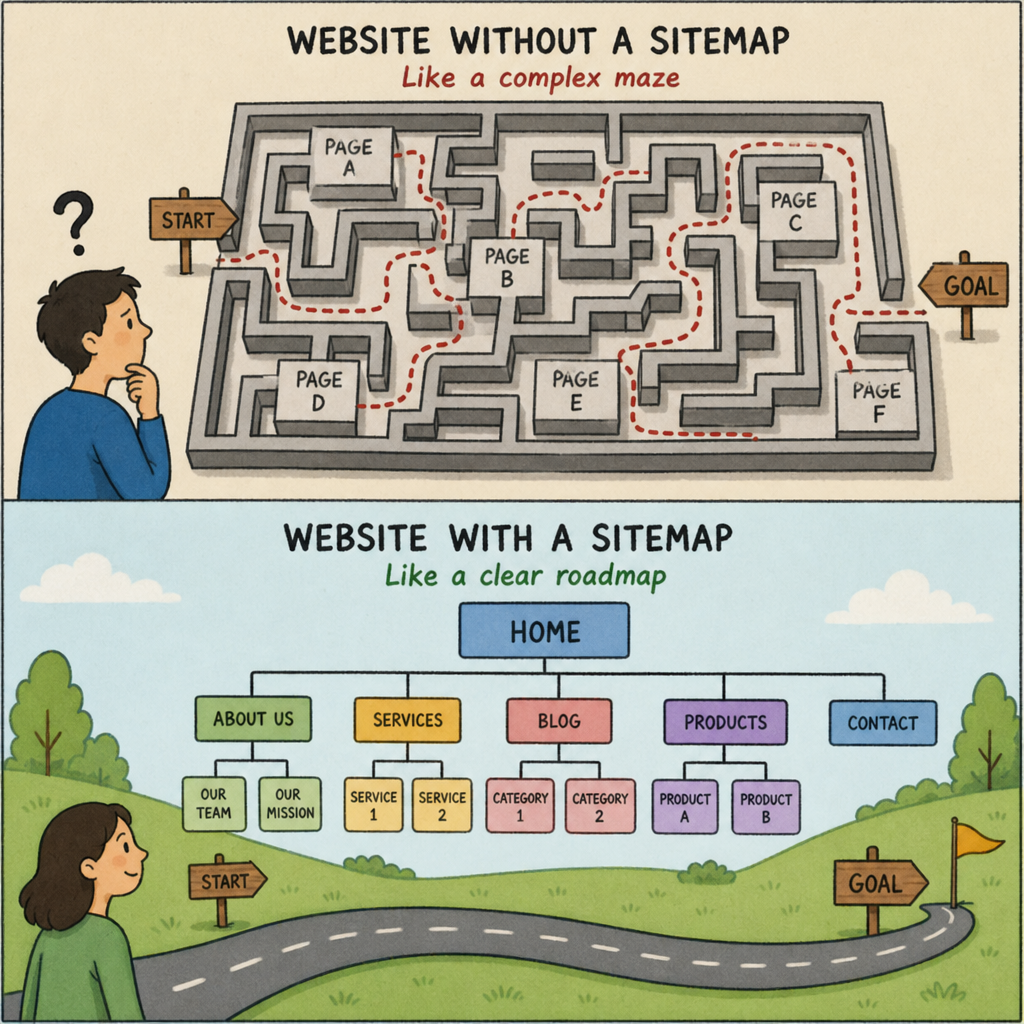
Why Do I Need an XML Sitemap?
You might be wondering, “Why do I need an XML sitemap if search engines already crawl links automatically?”
While it is true that Googlebot follows internal links to discover pages, this process is not foolproof. A sitemap acts as a direct line of communication with search engines, providing a comprehensive list of all the URLs you want indexed.
Creating a robust file is essential for SEO XML strategies because it:
- Helps discover orphaned pages: Pages with few or no internal links might be missed by crawlers. A sitemap ensures they are seen.
- Accelerates indexing for new sites: New websites lack the external backlinks that typically invite search engine crawlers. A sitemap forces the introduction.
- Highlights content updates: By using specific tags, you tell Google when a page was last modified, prompting a re-crawl.
- Plays a role in improving website crawl budget: By directing Google to your most important, canonical pages and leaving out junk URLs, you prevent search engines from wasting time, ensuring your high-value pages are prioritized.
Sitemap vs Robots.txt: What is the Difference?
A common area of confusion for beginners is the difference between sitemap vs robots.txt.
Think of your website as an exclusive museum.
- Your robots.txt file is the security guard. It tells search engine crawlers where they are not allowed to go (e.g., “Do not crawl the admin dashboard or the private employee directory”).
- Your XML sitemap is the museum map handed out at the entrance. It tells search engine crawlers exactly where the public exhibits are and the fastest way to reach them.
They work together. You should always ensure that the URLs you include in your sitemap are not accidentally being blocked by your robots.txt file.
Understanding Sitemap Protocol and Tags
Before you build XML sitemap files, it is helpful to understand the underlying code. The structure of these files relies on standard sitemap protocol and tags.
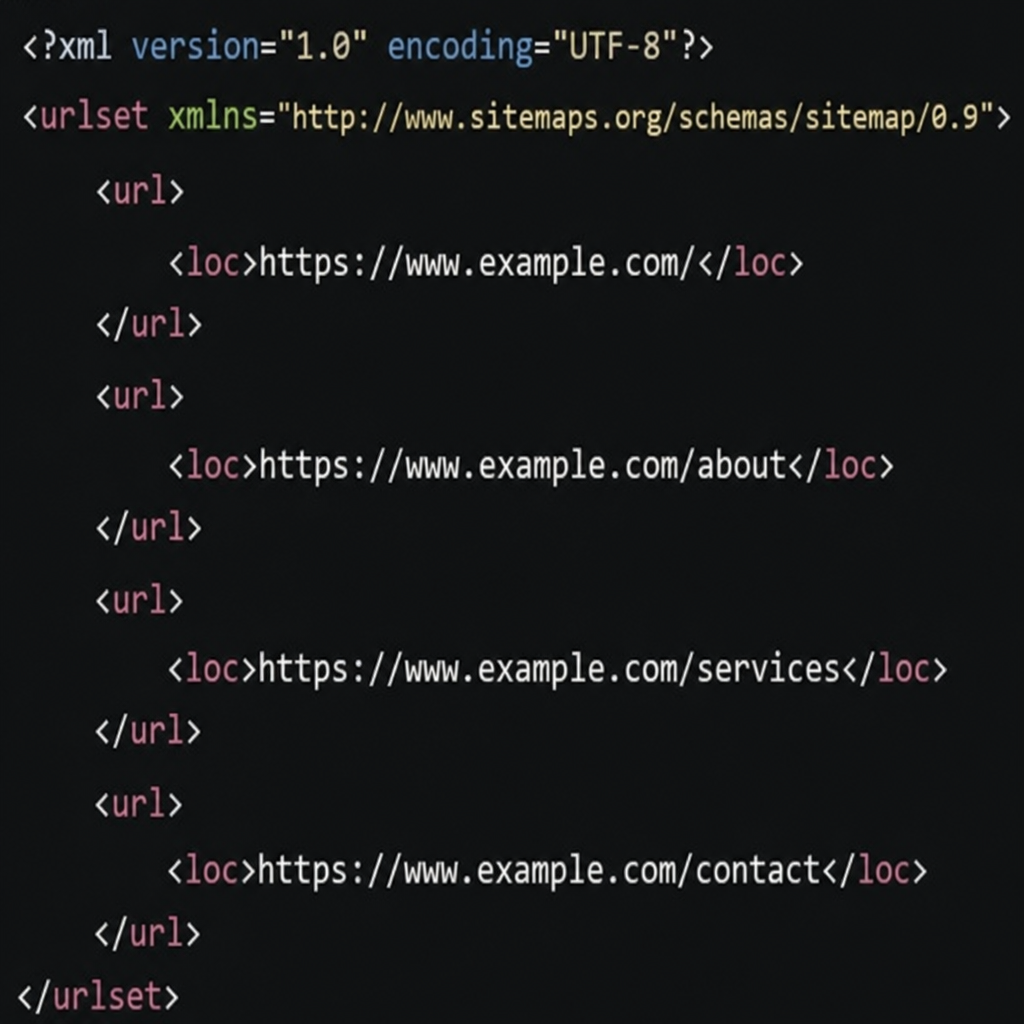
Here is what a basic XML sitemap looks like:
<?xml version=”1.0″ encoding=”UTF-8″?> <urlset xmlns=”http://www.sitemaps.org/schemas/sitemap/0.9″> <url> <loc>https://www.yourwebsite.com/</loc> <lastmod>2023-10-01</lastmod> </url> </urlset>
Let’s break down these essential tags:
- <urlset>: The opening and closing tag that encapsulates all the URLs. It references the current protocol standard.
- <url>: The parent tag for each specific webpage entry.
- <loc>: The absolute URL of the page (the “location”). This tag is mandatory.
- <lastmod>: Indicates the date the file was last modified. Pro tip: Google relies heavily on this tag to determine if a page needs to be re-crawled.
Note: In the past, tags like <changefreq> (how often the page changes) and <priority> (the importance of the page relative to others) were popular. However, Google has officially stated they generally ignore these tags today, so focusing on <lastmod> is a much better use of your time.
Dynamic vs Static Sitemaps
When you set out to create XML sitemap files, you have two overarching choices: dynamic or static.
Static Sitemaps: This is a fixed file. If you publish a new blog post, you have to manually update the sitemap file and re-upload it to your server. This is highly inefficient for growing websites and often leads to outdated sitemaps.
Dynamic Sitemaps: These sitemaps are generated on the fly by a script or a plugin. Whenever you hit “publish” on a new page or update an existing one, the sitemap automatically updates itself.
For 99% of modern websites, dynamic sitemaps are the recommended route.
How to Create an XML Sitemap (3 Methods)
There is no single right way to do this. Depending on your platform and technical comfort level, here are three ways to generate XML sitemap files.
Method 1: Using CMS Plugins (e.g., WordPress)
If you are using a Content Management System (CMS) like WordPress, Shopify, or Wix, creating a sitemap is incredibly easy. Platforms like Shopify and Wix generate them automatically.
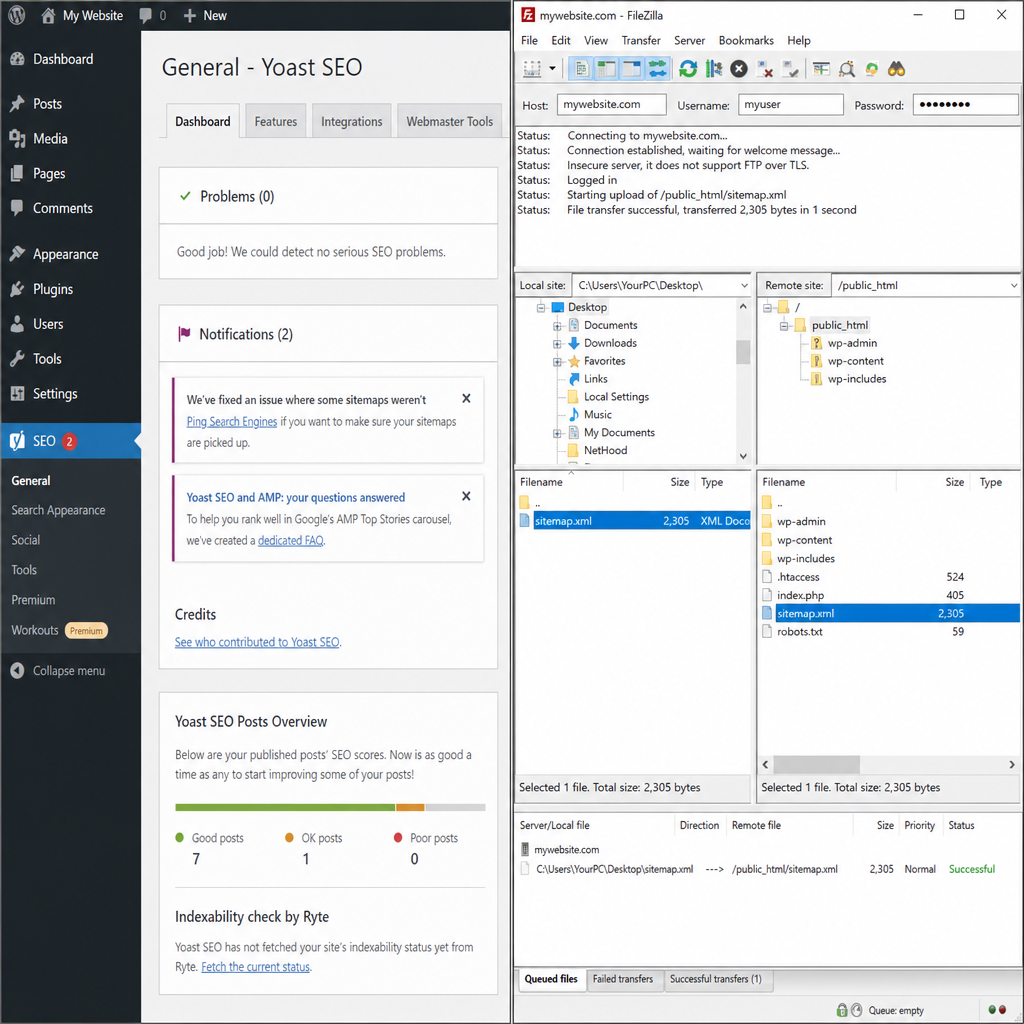
For WordPress, SEO plugins are the best route. For instance, configuring Yoast SEO sitemap settings takes just a few clicks:
- Install and activate the Yoast SEO plugin.
- Navigate to Yoast SEO > Settings in your left-hand dashboard.
- Scroll down to the APIs section and find the XML Sitemaps feature.
- Ensure the toggle is set to “Enabled.”
- Click “View the XML sitemap” to confirm it is live.
Method 2: Using Online Generator Tools
If you have a custom-coded website or use a CMS without built-in sitemap capabilities, you can use the best free sitemap generator tools. Websites like XML-Sitemaps.com or Screaming Frog SEO Spider allow you to generate a file quickly.
- Enter your website’s URL into the generator tool.
- Click “Start” and let the tool crawl your site.
- Download the generated .xml file.
- Upload this file to the root folder of your website via FTP or your hosting file manager (so it lives at yourdomain.com/sitemap.xml).
Method 3: Manually Building an XML File
For a very small, static website (e.g., a 3-page portfolio), manually building an XML file is entirely possible.
- Open a plain text editor like Notepad or TextEdit.
- Input the standard sitemap protocol tags discussed earlier.
- Add a <url> block for each page on your site.
- Save the document with a .xml extension (e.g., sitemap.xml).
- Upload it to your server’s root directory.
Advanced Sitemap Configurations
As your website grows, a basic sitemap might not be enough. You may need to implement more advanced sitemap XML SEO strategies.
Image and Video Sitemaps
If visual media is central to your business (like a photography portfolio or a recipe blog), standard sitemaps might not cut it. You must meet specific image and video sitemap requirements to ensure your media ranks in Google Images and Google Video search.
- Images: You can add <image:image> and <image:loc> tags within your standard sitemap to point search engines directly to the media files.
- Videos: Video sitemaps require significantly more data, including <video:title>, <video:description>, <video:thumbnail_loc>, and <video:content_loc>.
Sitemap Index Files
What happens if you have a massive e-commerce site with hundreds of thousands of pages? You will hit the maximum file size limits (more on this below).
The solution is a sitemap index file structure. Think of this as a “sitemap of sitemaps.” Instead of linking to individual web pages, the index file links to other sitemaps (e.g., post-sitemap.xml, product-sitemap.xml, category-sitemap.xml). When you submit the single index file to Google, it automatically reads all the sub-sitemaps contained within it.
XML Sitemap Best Practices
To ensure your setup is actually helping your SEO efforts, adhere to these XML sitemap best practices:
- Respect Sitemap Size Limits: Familiarize yourself with sitemap size limits and best practices. A single XML sitemap can contain a maximum of 50,000 URLs and must not exceed 50MB uncompressed. If you surpass these limits, you must split your URLs across multiple files and use a sitemap index.
- Only Include “200 OK” Indexable Pages: Your sitemap should only contain your highest quality, canonical URLs. Do not include URLs that redirect (301), return errors (404), require a password, or have a noindex tag.
- Update Consistently: Wondering how often to update sitemap file records? If you use a dynamic setup, this happens instantly. If you are doing it manually, you should update the file every time you add, remove, or significantly alter a core page on your site.
- Reference it in Robots.txt: Always add a link to your sitemap at the very bottom of your robots.txt file (e.g., Sitemap: https://www.yourdomain.com/sitemap_index.xml). This helps other search engines, like Bing or DuckDuckGo, find it effortlessly.
How to Test and Submit Your Sitemap
Once you have generated your file, do not just leave it sitting on your server. You need to validate it and hand it directly to Google.
Step 1: Validate the Code
Before submitting, run your URL through online XML sitemap validator tools (like the XML Sitemap Validator by Yandex or FreeFormatter). These tools will instantly flag syntax errors, broken code, or missing mandatory tags that could prevent search engines from reading the file.
Step 2: Submit to Google
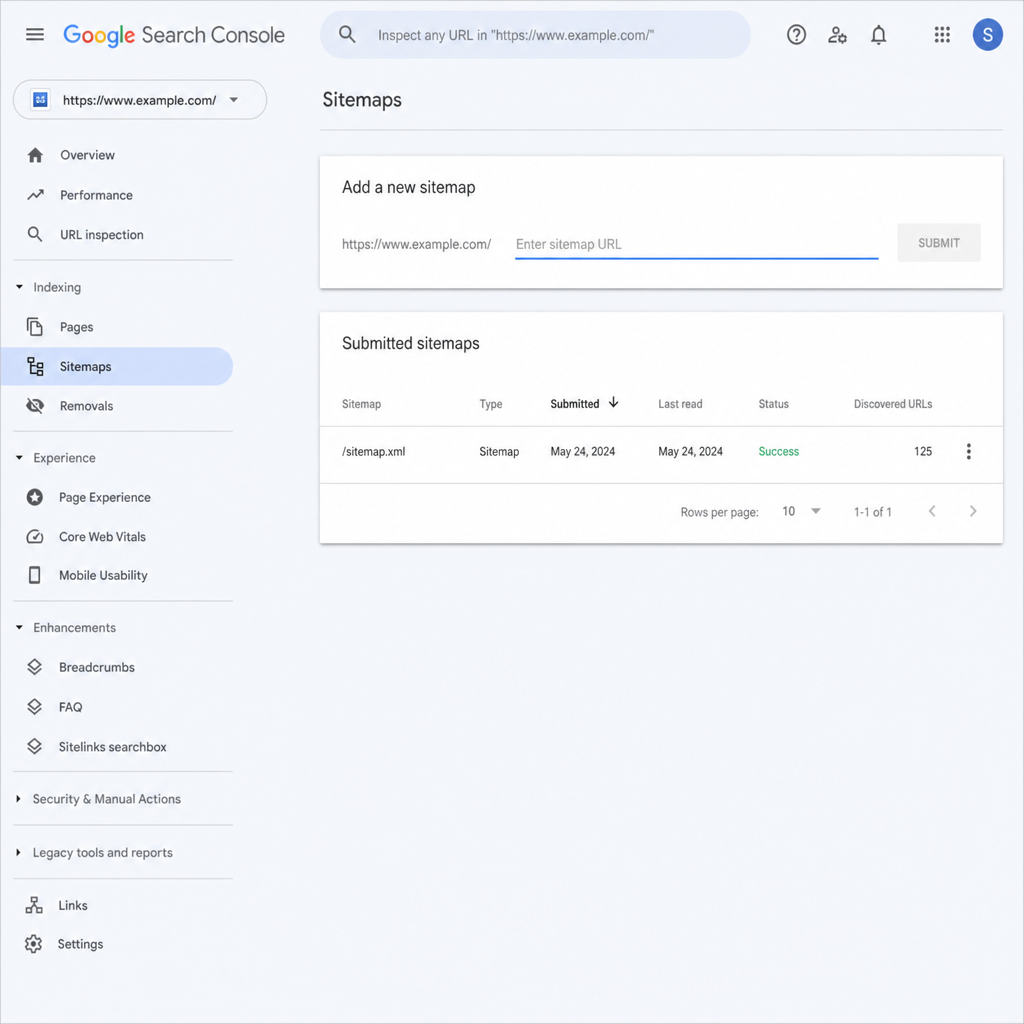
To guarantee Google knows your roadmap exists, you must submit XML sitemap to Google Search Console (GSC).
- Log in to your Google Search Console account.
- Select your website property.
- In the left-hand menu under “Indexing,” click on Sitemaps.
- In the “Add a new sitemap” field, paste the end of your sitemap URL (e.g., sitemap.xml).
- Click Submit.
Google will process the file, and you will see a status message. Ideally, it will read “Success” in green text.
Fixing Sitemap Indexing Errors
Sometimes, things don’t go perfectly. Fixing sitemap indexing errors promptly is vital for maintaining your site’s health. Here are a few common errors you might see in Google Search Console and how to fix them:
- “Couldn’t Fetch”: This vague error often means Googlebot was temporarily unable to reach your server, or your URL was typed incorrectly. Double-check the URL, wait a few hours, and try submitting again.
- “Submitted URL blocked by robots.txt”: You have included a page in your sitemap, but your robots.txt file is telling Google not to crawl it. You must either remove the page from the sitemap or adjust your robots.txt rules.
- “Submitted URL marked ‘noindex'”: You are asking Google to index a page via the sitemap, but the page itself has a meta noindex tag. Decide whether you want the page indexed (remove the tag) or not (remove it from the sitemap).
- HTTP Error (e.g., 404): Google tried to access the sitemap file but found a dead link. Ensure the file is actually uploaded to your server and mapped to the correct URL.
Final Thoughts
Learning how to create an XML sitemap is one of the highest-ROI tasks you can perform for your website’s technical health. By providing search engines with an organized, error-free directory of your content, you take the guesswork out of crawling and indexing.
Whether you rely on an automated plugin to generate XML sitemap files or hand-code one yourself, the ultimate goal is clear communication with search algorithms. Take the time today to review your current setup, clean out any non-indexable URLs, and ensure your sitemap is successfully registered in Google Search Console. Your website’s search visibility will thank you.
Read more for Site Architecture SEO